RBAC Access Control#
Introduction#
This section explains how user management is implemented in Piveau. Piveau consists of multiple microservices, open-source software, and a set of distinct web-based user interfaces. To enable Single Sign-On (SSO) across all user interfaces and provide authentication and authorization for all microservices, we use Keycloak [^1] as the central identity and access management service.
This section refers to piveau access control V2. Please read the corresponding description carefully before proceeding with this section.
Users are created and managed in Keycloak. This also includes assigning them to the appropriate roles within a specific context. The following contexts are supported:
- System-wide
- Super catalogue
- Catalogue
- Datasets and custom resources
A Keycloak group is a universal element used to structure information. In our case, groups have a specific meaning. Each context is represented as a Keycloak group (referred to as a Context Group). Each role within a context is represented as a subgroup of the Context Group (referred to as a Role Group).
Assigning a user to a role in a specific context is achieved by adding the user to the corresponding Role Group.
The administrator's tasks therefore include creating and maintaining users, as well as assigning them to one or more Role Groups.
Note: At this point, any user in Keycloak who has the required permissions for the following tasks is referred to as an Administrator: 1. Creating and managing users 2. Assigning users to Role Groups
This can be the Master Admin, but it can also be any user with the appropriate rights.
Process#
The process for using Access Control can be described as follows:
- Configure backend services
- Define roles to be used within the respective contexts in the specific project
- Define a strategy for maintaining datasets and custom resources in Keycloak
- Enable the feature flags in corresponding backend services
- Install Keycloak
- Configure Keycloak
- Create a realm
- Create and configure all required clients (e.g.
hub-repo,hub-search)
- Create and manage users
- Assign roles to users
How to install Keycloak#
To install the Keycloak please use official sources [^3].
How to configure Keycloak to work with Piveau#
- Navigate to the
Administration Console(e.g. http://localhost:9080) - Create a new realm called piveau:
- Open Keycloak’s administration console.
- In the left menu, click on
Manage realms. - On the new page, click on
Create realm. 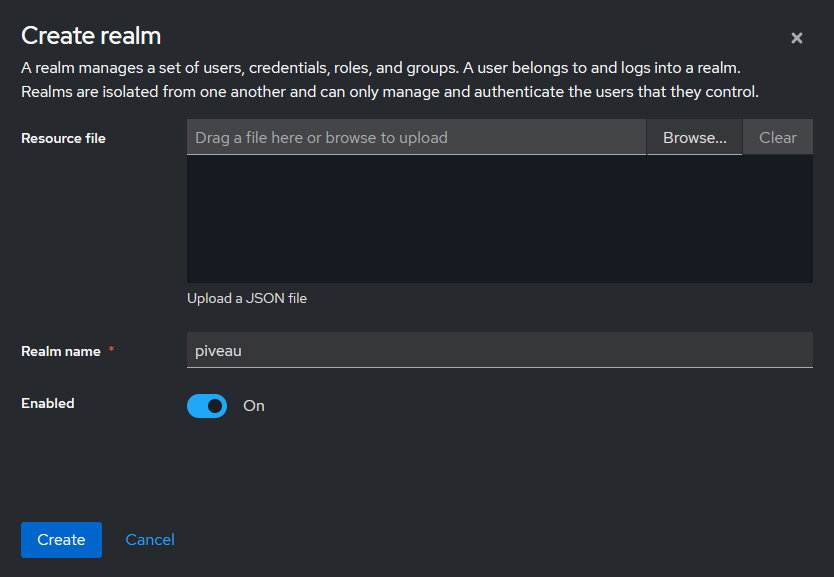
- Select or activate the newly created realm (
Manage realms→piveau). - Create a new client representing the Piveau backend:
- In the left menu, navigate to
Clientsand clickCreate client. - Use the following settings:
- Client type → OpenID Connect
- Client ID → piveau-hub-repo
- Client authentication → ON
- Authorization → ON
- Standard Flow and Direct Access Grants → ON
- Navigate to
Clients→piveau-hub-repo→Service account rolesand assign the following roles:realm-management→manage-usersrealm-management→manage-clients
- In the left menu, navigate to
- Create a new client representing the UI application:
- Use the following settings:
- Client type → OpenID Connect
- Client ID → piveau-hub-ui
- Client authentication → OFF
- Authorization → OFF
- Standard Flow, Direct Access Grants, Implicit Flow → ON
- Set valid redirect URIs according to your deployment setup:
- Examples:
"*","https://<your-domain>/"
- Examples:
- Use the following settings:
- Configure relevant backend services according to the corresponding access control description
On startup of the hub-repo service, the roles for the system-wide context are created. Based on the configured settings, a corresponding group structure is automatically created in Keycloak during the first startup of the hub-repo service:
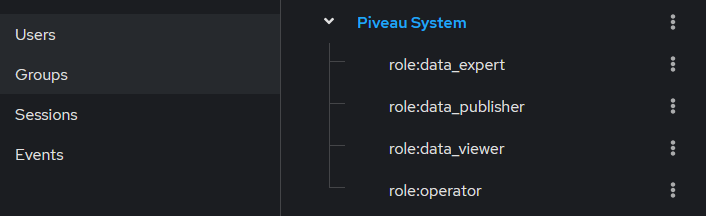
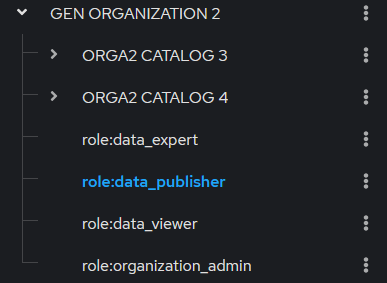
The group and role structure reflects the entities defined in the backend. The group structure for the system-wide context and for all super catalogues and catalogues is maintained automatically by the backend. There is no need for manual maintaining of the group structure by the administrator (Exception: an administrator can create and maintain custom roles. This topic is outside the scope of this documentation.). Below is an example of the context and role groups:
How to create, edit, delete accounts#
The detailed process is described in the official Keycloak documentation.
In general, user accounts can be created in two ways:
- Users are created by an administrator
- Users self-register
User data can be modified in two ways:
- By an administrator using the administrator console (
http://localhost:9080/admin/master/console/orhttp://localhost:9080/admin/piveau/console/) - By the user through the account console (
http://localhost:9080/realms/piveau/account/)
Users are created exclusively within the piveau realm.
Configure login method#
Different login methods can be configured. For certain features, an email server configuration is required:
- Email verification
- Forgot password
To configure email settings, navigate to Realm settings → Email.
If the mentioned features are not used, this configuration is not required.
The login methods are configured under Realm settings → Login.
Create and delete user by an administrator#
This section focuses on user creation by an administrator. Self-registration is out of scope, but can also be used if required.
- Log in as an administrator.
- Navigate to
Users→Add User. - The administrator can either complete all fields or only the required username. If only the username is provided, the user will be prompted to enter the remaining data upon first login.
- Click
Createto create the user. At this point, the user does not have any credentials. - Set credentials by navigating to
Users→<username>→Credentialsand clickingSet password. - Provide an initial password and set
Temporaryto ON. This requires the user to change the password upon first login. Use a password that complies with your organization's password policies.
Background on Required user actions:
Under User → <userName> → Required user actions, administrators can define actions that the user must complete at the next login. Examples include:
Update Password: The user must change the password at next login. This is automatically assigned if the password is set asTemporary.Update Profile: The user is prompted to update or confirm their profile information.Verify Email: The user must verify their email address. This requires Keycloak to send an email, which in turn requires SMTP server configuration.
Once an action is successfully completed by the user, the corresponding entry is automatically removed from the list of required actions.
Required user actions can be added or removed by the administrator at any time.
To delete a user: Users → <userName> → Action: Delete
Update user data#
User data can be updated by either an administrator or the user:
-
Administrator
- Navigate to
Users→<username>, update the desired data, and save the changes.
- Navigate to
-
User
- Log in to the account console (
http://localhost:9080/realms/piveau/account/). - Edit your data.
- Save the changes.
- Log in to the account console (
How to assign, edit roles#
Note: Specific roles are configured within the context of hub-repo. Therefore, role names may differ between projects.
Note: Currently, it is not intended to assign a user directly to a super catalogue, catalogue, or dataset/custom resource. Users can only be assigned to a role group. Assignment to a context group may become relevant in the future.
Once a user has been created, permissions within piveau can be assigned. A role is represented as a Role Group, meaning that assigning a role is accomplished by assigning the user to the corresponding Role Group.
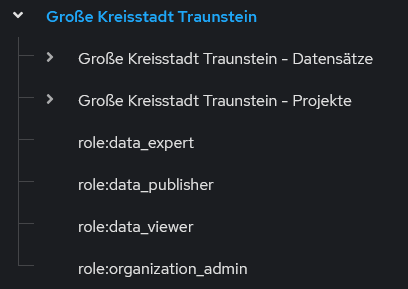
A Context Group represents an entity defined in the backend. A user is not assigned directly to such a group. At present, such an assignment has no semantic meaning. Instead, users are assigned to groups that represent a role within a context (Role Group).
Context Group example
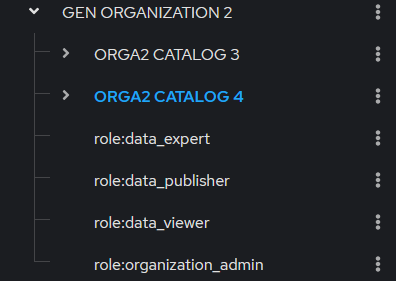
Role Group example
There are two ways to perform such an assignment: starting from the user or starting from the Role Group.
Assign roles starting from the user#
- Navigate to the user to whom you want to assign a role.
- Click on
Groups. - Assigned roles (role-groups) are listed here and can be deleted individually.
- To add a new role, click on
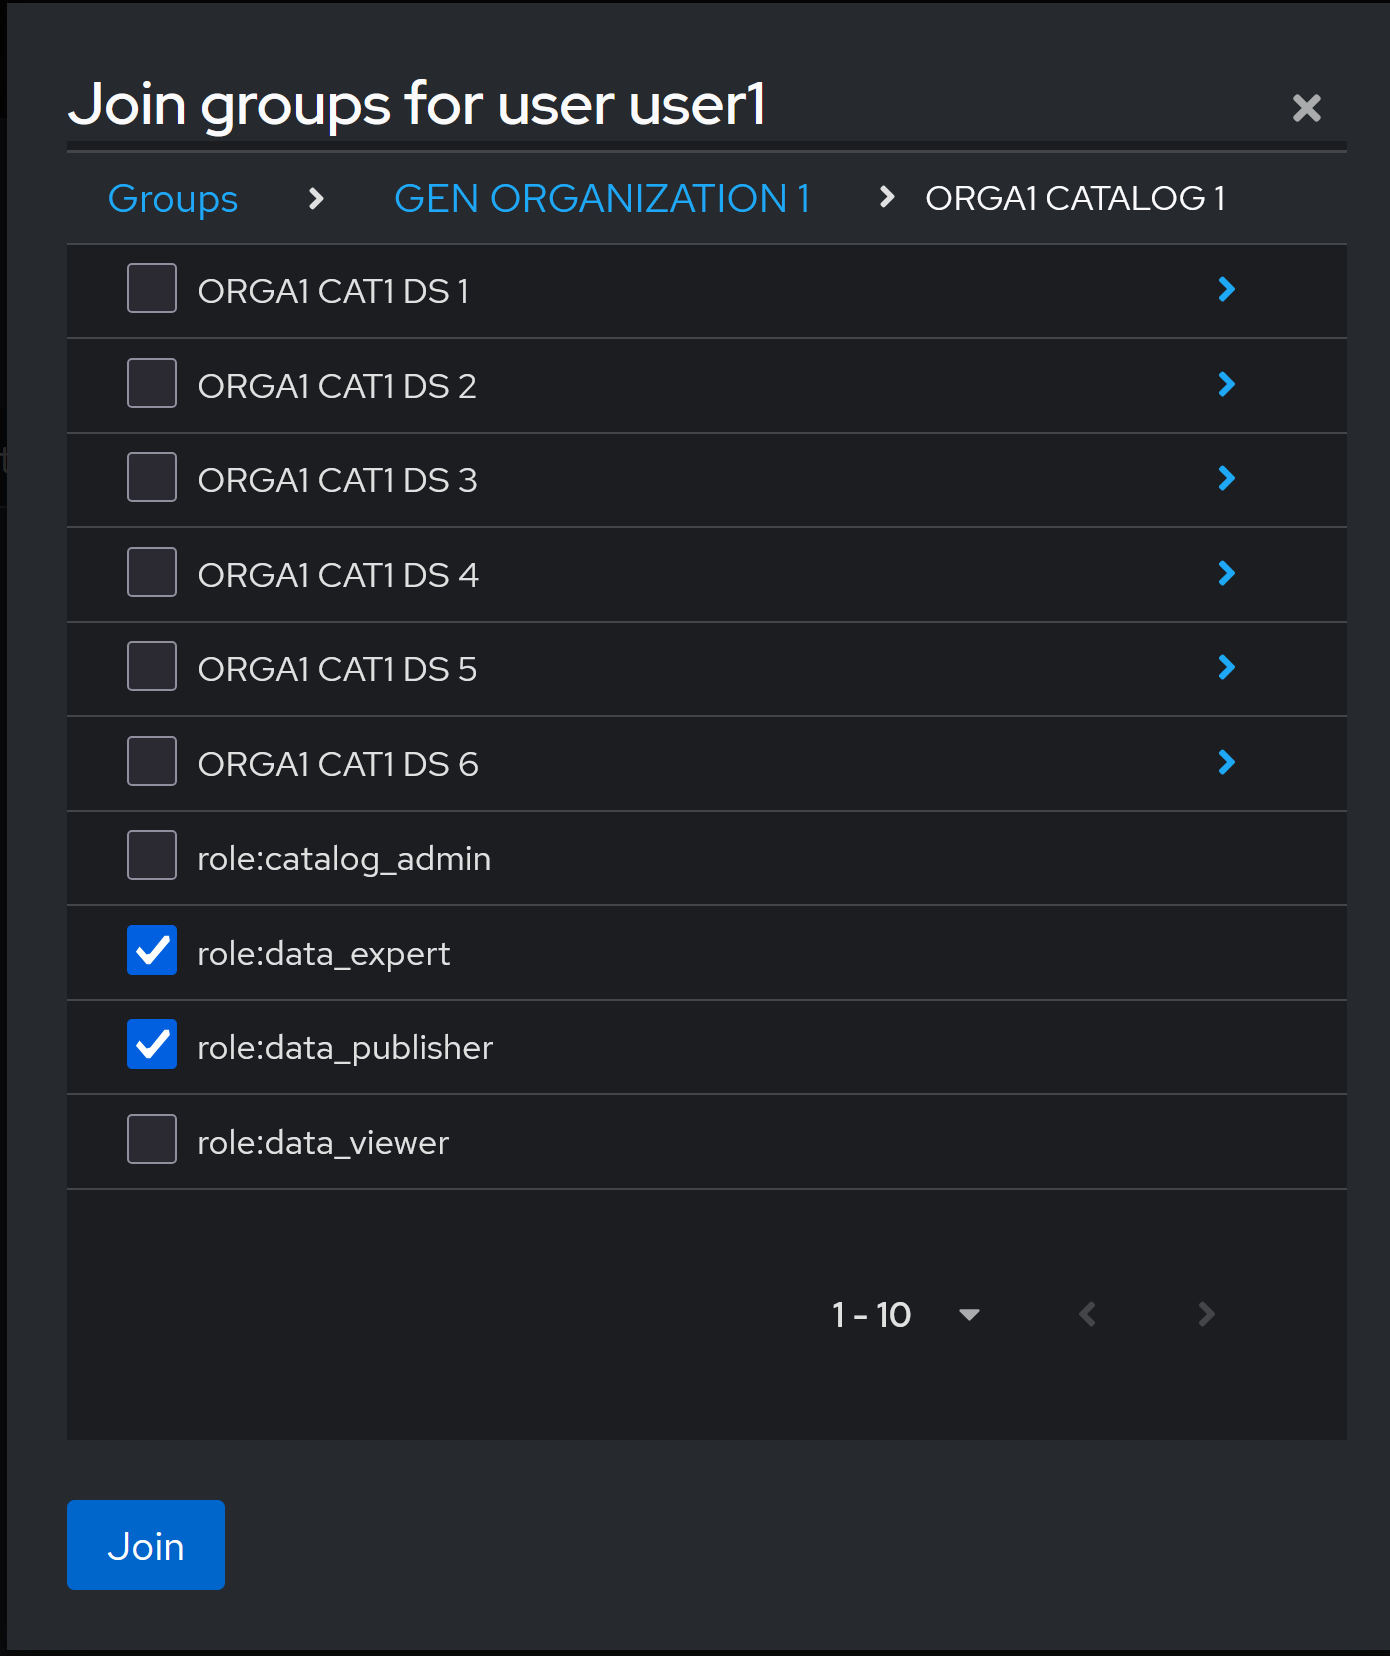
Join Group. - A dialog window will appear. Navigate to the relevant role-group and select it. Multiple groups can be selected.
- Click on
Join.
Dialog window to assign groups to a user
Assign roles starting from Role Group#
- Navigate to the role group:
Groups->select role-group->members. - In this view, you can manage and remove users already assigned to the role group.
- To add a new user to the role, click on
Add member. - Select the user(s) you want to add and click
Add.
[^1]: Open Source Identity and Access Management
[^2]: Kantara Initiative:Federated authorization for user-managed access uma 2.0.